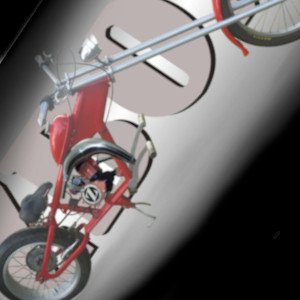
How to Start a Motorized Bicycle
How to start a Motorized Bike - The Ultimate Guide
After you have installed your gas bicycle motor, how to start a motorized bicycle for the first time can be confusing.
You think you have installed everything correctly, but often the bicycle motor just doesn’t want to start.
This article clarifies how to start a bicycle with a motor, how to stop it and how to maintain your motorized bike.
These tips will ensure that your bicycle motor starts easily every time.


Fuel:Oil mix for motorized bicycle
Fuel: The preferred fuel is ‘E10’ (Unleaded + Ethanol, usually 91 Octane) or ULP (94 Octane).
Mix fuel and oil at a ratio of 30:1 (35ml of oil per litre of fuel). 20:1 (50ml of oil per litre of fuel), if working the motor hard and/or operating in hot conditions and for running-in.
WARNING: External fuel filters can cause failure of bicycle motors.
The tap filter is more than adequate. If an extra filter is supplied, discard it.
Valvoline “Two-Stroke Racing Oil” is highly recommended. Use Valvoline “Two-Stroke Oil” as an alternative which is readily available at most auto parts stores.
WARNING: Synthetic oils or blends in bicylce motors can cause premature wear of bearings and seals.
Spark plug and plug cap
There are two types of spark plug cap. One is a soft rubber type with a spring coil inside that fits the brass cap on the plug.
Make sure the cap is screwed on firmly. The other type is a hard plastic cap and the threaded brass cap needs to be removed and discarded. If this is not done, it will cause poor ignition performance.
Ignition failure is very rare (most faults are fuel related), however when and ignition fault does occur, it is almost always due to a wiring fault.
In two-stroke bike motors, spark plugs almost never fail.
Fuel Tap
Always turn the fuel tap “off” when the motor is stopped.
The most likely cause is ‘flooding’ (too much fuel in the motor).
To correct this, turn the fuel ‘Off’ set the choke to the ‘Off’ position (lever down) and with the throttle fully open (don’t be heavy handed, you can damage the throttle handle), pedal the bike, with the clutch engaged, for about 100 metres.
If flooding is the problem, the motor should start to ‘fire’ and gradually begin to run. As it picks up speed and runs smoothly, turn on the fuel. Next time you attempt to start the motor from cold, use less choke and ‘tickler’ time, or even do not use the ‘tickler’ at all.
Follow this link for more help with starting problems.

1. Check fuel level and top up if necessary.
2. Turn on fuel tap and depress the ‘tickler’ for 3-10 seconds (the longer time in cold weather).
3. Set the choke to the ‘half closed’ position (lever down is the ‘Off’ position).
4. With clutch engaged (lever released), rock bike rearwards until resistance is felt.
5. Disengage clutch (pull in lever and engage the lock button).
6. Pedal the bike up to a speed of about 12-15kph (jogging pace), with the throttle about half open and release the clutch lever by pulling on it and then letting it go. Continuing pedaling.
7. The motor will begin to turn and fire occasionally. Use the throttle to vary road speed and move the choke lever to a position that keeps the motor running evenly.
8. As the motor warms up less choke will be required and after about 30 seconds the motor should run properly without any choke (lever down on NT carb).
The motor may not idle at the correct speed, follow these instructions to re-set the idle speed.
The Idle Speed Screw is mounted on the RH side of the carburetor body and is used to set idle speed. Turn it clockwise to increase speed. Idle speed should be between 2000 – 3000 RPM. This is a slow speed at which the motor will run constantly without stalling.
Motorized bicycle engines can be easily started without pedaling.
You can, of course, push your bike, jump on and drop the clutch.
Pull start motors can be purchased and after market pull starts can be attached.
Pull start motors are not recommended. The mechanisms are very unreliable, rarely set correctly, and they are relatively expensive.
Similarly, electric start motors are available. Electric start bicycle motors are, however, considerably wider than regular 2-stroke motors. The extra width of the bike engine often means that you have to use an extended pedal crank to use the pedals.
The easiest way to start a motorized bicycle is to use a hand held drill with a clutch attachment.
First, remove the four cross head screws from the front cover plate on the left side of the bicycle motor. Removing the cover provides access to the 12mm nut which fixes the magnet to the crankshaft.
Using a drill with a 12mm socket, spin the crank clockwise and the motor should start easily.
It is important to use a drill with an over-running clutch bit. (These are available to start “weed whackers”.
Using a clutch bit drill attachment is important. Motors can be started without the over-run clutch attachment, however, when the bicycle engine kicks, it will jerk the drill which could result in injury.
Running in
Correct running in procedure is essential for good performance, fuel consumption, and long life of the motor, however, the procedure is simple to follow.
To ‘bed in’ the motor, start the motor as per instructions above, and ride the bike at a slow but comfortable speed where the motor runs smoothly.
Warm the motor up by opening the throttle in bursts of 5 to 10 seconds (full throttle is OK). Between the bursts of power, allow the motor to slow down to cool it, do this for about 20 seconds, then repeat the throttle bursts.
Keep oil and fuel moving through the motor by just ‘cracking’ the throttle a fraction every few seconds. This helps the cooling process and reduces the risk of damaging the motor. Repeat the ‘power on, power off’ procedure for 5 minutes, gradually increasing speed as the motor runs smoother and develops more power.
Check the temperature of the motor by touching the fins briefly with your fingers. If it is too hot to touch, stop the motor and let it cool down. This technique helps generate heat (essential for ‘seasoning’ the motor) and moves oil through the motor, helping various components (such as, rings, bearings and seals) to ‘settle in’.
Repeat the above procedure after allowing the motor to completely cool down (about 30 minutes) and then repeat the process. You should find the motor runs smoother with more power and more responsive to throttle changes.
You can now use longer bursts of full throttle, but still check for over-heating.
Note: A gradual loss of power may indicate the motor is over-heating. Apply a small amount of choke and use low throttle settings. Ideally, it is best to stop the motor and allow it to cool down. When re-started, the motor should perform normally with good power.
User’s Notes
New two stroke motors don’t like to run at a constant speed or constant load. So to complete the running in
process, simply ride the bike as you would normally would except vary your speed and load by opening the throttle and then closing it every few seconds or so. Using this technique throughout the life of the motor will greatly extend its life.

After running the motor for ten minutes or so, the base and head gaskets compress and so the head retaining
nuts become a little loose.
It is correct practice to re-torque’ the nuts but it must be done with a 10” or similar torque wrench. A typical automotive wrench is not accurate enough and many studs have stripped from motors as a result of using this type of tool.
If you do not have access to the correct tool, then do not touch the nuts! Most
motors run fine for years without ever having the head nuts being re-torqued.
If you have the correct tool, the torque setting is: 1.4Nm (12 ft/lbs) for M8 nuts and 1.1Nm (10 ft/lbs) for M6 nuts.
Tighten evenly using a star pattern.
WARNING: There is no warranty for stripped head nuts or cranks studs.
Note: If any item is incorrect – FIX IT!! Breaking down 20 klms from home can be a real pain!
Stopping the motor. WARNING: Do not leave the bike unattended with motor running. Do not idle the motor for more than 30 seconds, it may overheat.
Before Setting Off On A Ride
1. Check you have your helmet and any other safety equipment you use.
2. Check brakes, clutch, throttle, gear shift levers, bell and motor controls for correct adjustment and operation.
3. Check the bike generally for loose pedals, fittings or fasteners, damaged wheels and spokes. Check motor, exhaust and carburetor are secure. Check for signs of gas leaks, wet oil is a sure sign something is wrong.
4. Check seat and handle bar position.
5. Check lights and reflectors if riding at night.
6. Check tire pressures (low pressure can cause punctures or blowouts).
7. Check fuel quantity (do you have enough for the round trip)?
8. Check motor drive chain is not binding and tension is correct (about 2 – 3 inches of droop).
There are four methods for stopping the motor.
1. With the clutch disengaged, press and hold the yellow button near the twist grip, until the motor stops. This is the preferred method.
2. Turn the fuel tap to the ‘off’ position and allow the motor to run out of fuel. This may take some time.
3. ‘Panic stop’ – with the clutch still engaged, apply both front and rear brakes hard until the bike stops.
4. With the clutch disengaged and the motor idling, apply the rear brake and slowly release the clutch.
Note: At the end of a trip it is recommended that you turn the fuel off about 200 meters from the end of the journey, and stop the motor as in (1) when you reach your destination. This drains fuel from the carburetor, reducing water or dirt contamination, and allows a fresh charge of fuel at the next start-up.
Tire Pressures
Due to the extra weight of the motor etc. it is important to pay special attention to tire pressures.
Set to a minimum of 45 psi. If there is a maximum pressure rating on the tire, pump the tire up to this pressure.
Low pressures can cause a puncture, broken spokes or buckled wheels. The heavier the rider, the higher the pressures should be.
When new, the gearbox and clutch may make weird clattering and whining noises. This is normal and the noise should reduce over the first 5 or 6 tanks of fuel.
Add grease to the gearbox after about 10 minutes running, and check every 6 months and add more grease if gears appear shiny or dry, apply grease where
the gears mesh. Initial fill: Use six pumps of general purpose grease from a hand pump grease gun.
Fuel & Oil Leaks
Regularly check for fuel and oil leaks. Motor vibration can cause some movement of seals, leading to weeping of fluids.
Fluid leaks are an early indicator of an impending failure. Usually tightening nuts and fittings will cure this.
Oil may drip out of the end of the exhaust pipe while the bike is in storage. Best to place a rag under the exhaust outlet to catch the drops. Once the bicycle motor is properly run in, this condition usually disappears.
NOTE: Any oil leaking from a two stroke motor means there is a gas leak that needs to be fixed.
Conclusion
These article covers every aspect of how to start a bicycle motor. In addition, we provide solutions if your motor won’t start.
The article covers important maintenance items and a schedule of what you should be checking on a daily, weekly, and monthly basis to maintain your motorized bicycle.
Following these guidelines will ensure that you obtain years of reliable service from your bicycle motor.