MOTORIZED BIKE WONT START
The Ultimate guide to Motorized Bicycle repair
Motorized bicycle not starting?
There are three separate areas that can cause starting problems in motorized bicycle engines:
- 65% of problems are linked to fuel
- 34% of issues with bicycle motors are spark related
- 1% of problems are due to bad compression.
Most starting problems with motorized bicycle kits are fuel related, however, there is a proven method of resolving the starting problems of any internal combustion engine. Rather than first assuming that the motor has the most common fault, we perform the easiest tests first to help us identify the problem.
1. Motorized bike no spark
Although fuel related problems are most common faults in motorized bicycle engines, the best way to resolve an engine starting problem is to rule out the most easily identified faults first.

1.1 ISOLATING ELECTRICAL FAULTS
There are five areas that cause electrical faults, and luckily, we can test for almost all of these. The most common causes of electrical faults are:
- bad connections
- magneto
- motorized bicycle cdi problems
- spark plug
- low magnetic induction

1.2 CHECK THE SIMPLE THINGS
Before purchasing a bunch of replacement motorized bicycle parts, you should first verify some simple things that can be overlooked. Check that the HT lead from the cdi to the spark plug cap has been fitted correctly and that the connections are tight and corrosion free.
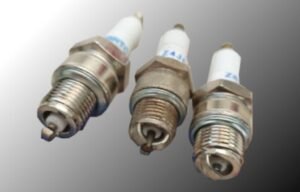
1.3 THE BEST SPARK PLUG FOR MOTORIZED BIKES
When testing the ignition on motorized bicycles, it is wise to disconnect the leads to the kill switch altogether. This is a potential source of trouble since the kill switch is only required to stop the engine not to start the engine.
1.4 DISCONNECT THE KILL SWITCH
Don't assume! Double check the simple things before you rip the engine apart.
Although it is rare to find a faulty spark plug, we recommend using an NGK BPM 6A spark plug with the gap set to 28 thou (0.7mm). This will ensure that you have the best, properly gapped spark plug and rule out this rare problem.
We have already covered the easiest of checks which is looking for bad connections. This one is so simple and fundamental but it has caught us out on several occasions. We encourage you to double check connections before moving on. A useful tip here is to pull your connectors on and off a few times. The reason for this is that rust can be a point of resistance. Pulling connectors on and off a few times will make sure that the wires are clean. It is especially important to unwrap taped wires if they are covering connectors. Electrical tape can trap water inside making corrosion worse.
1.6 CRIMP LOOSE CONNECTORS
Do not use electrical tape to fix a loose connection or water proof wiring. These simply don’t work. Water seeps into the wiring, causing shorts and the tape is too flexible to make any sort of effective electrical connection. If connectors are loose carefully crimp them with a pair of pliers to make them a firm fit. To do this, disconnect the connectors and gently crush the outer sleeve slightly, then refit the two pieces of the connector.
1.7 NO SPARK
The easiest initial test when beginning our troubleshooting is to check for spark. For most motorized bicycle engines, it is quick and simple to remove the spark plug to see whether there is a spark.
- Remove the spark plug from the cylinder head.
- Fit the plug cap back onto the spark plug terminal (the top of the spark plug).
- Leaving the spark loose, earth the ground electrode (screw threads) of the spark plug against the engine.
- Engage the clutch and turn the motor over. For a motorized bicycle engine you will have to push the bike up to around 5MPH. This should be easy as there will be little engine resistance as the spark plug is not in place.
1.8 MAGNETO WIRING
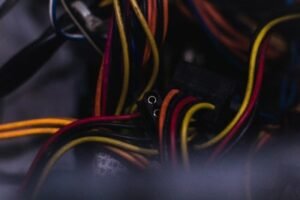
Motorized bike wiring diagram
Black wire on cdi connects to the black wire on the magneto. Blue wire on cdi connects to the blue wire on the magneto. If you have a white wire on the magneto of your bicycle motor, clip it short and wrap with insulating tape. Do not use the white wire!
The magneto is responsible for delivering charge to the cdi. A failing magneto will cause a weak spark and cause your bicycle motor to lose power. Make sure that the magneto is wired correctly. There are three wires on most motorized bicycle magnetos: Black, white and blue. Use only the black and blue wires. If you have a third , white wire, cut it short and wrap it with electrical tape. The black wire from the magneto should be connected to the black wire of the cdi. The blue magneto wire should connect to the blue cdi wire. The magneto is easily damaged by water. If you have recently ridden your motorized bicycle in the rain, it is the most likely cause of your engine failing to start. The magneto coils become wet and the coil overheats. The extra heat can break down the insulation on the magneto coil. Unplug the magneto connectors and, using an ohmmeter, measure the resistance between black and blue wires. The resistance should be greater than 300 ohms and ideally 380 ohms or more. If resistance is less than 300 ohms the magneto should be replaced. If you do not have an ohmmeter, a crude test is to use a 12 volt torch bulb. Connect the blue and white wires to the bulb, put the motor in gear and push the bicycle (it is easier to push the bike if the spark plug is removed first). If the magneto is working well, you should see the bulb light up.

There are no simple tests for faults with the cdi (Condensed Distributed Ignition). The cdi is most prone to fail after a rough ride or being knocked. If the magneto on your motorized bike has more than 300 ohms of resistance then you should replace the cdi. It is worth spending an extra few dollars for and upgraded cdi. We have tested high performance cdi’s and found that they improve the strength of the spark which helps engine starting. We did not observe any noticeable improvements on speed or acceleration.
2. MOTOR HAS SPARK AND GAS BUT WON’T START
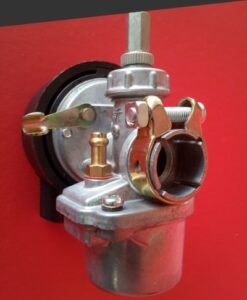
The NT carb for motorized bicycles
This is the most common carburetor provided in motorized bicycle kits. It is very simple but performs well if set up correctly.
Once you have confirmed that there is a good spark on your bicycle motor, then we move on to test for fuel issues. The bulk of starting issues with motorized bicycle engines are fuel related
1) Flooded engine,
2) sticking float or
3) blocked fuel jet,
There are some useful first steps to check.
The most common carburetor for motorized bicycles is the NT carb. Although the NT carb is very simple, it performs well and many aspects are well designed. NT carbs have an easily accessible drain screw in the bottom of the fuel bowl. This drain hole can be opened by removing this screw. Turn the stop valve on the fuel tank to the off position. Place a small container under the carb and remove the drain screw. Opening the screw with the fuel stop closed allows an ounce or two of fuel to run out from the carburetor float bowl. Emptying the bowl flushes out sediment that may have built up in the bottom of the carb. After the fuel has emptied from the bowl, with the float screw still removed, turn the fuel stop back on for a few seconds. Fuel should start flowing from the drain hole after a short delay. This is a simple check to make sure that there are no fuel restrictions between the gas tank and the carb. If the fuel flow is poor then check the fuel filter for sediment build up and clean out the fuel pipes.
2.2 USE FRESH GAS
If fuel flow is restricted, or your motorized bicycle has been stored for some weeks, you may need to replace the gas : oil mixture and clean the carburetor. When gas : oil mixture evaporates in the fuel bowl, the residue can become thick like gelatin. The jellified fuel can block fuel jets and filters. In addition, gasoline draws water vapor from air. If the bike is parked, the fuel can go off after a few weeks.
2.3 CLEAN THE CARBURETTOR JET

NT carburetor jet
The jet can be unscrewed from the stanchion for cleaning
Unscrew the jet from the fuel stem and hold it to a light. You should see a clear pinhole through the center of the jet.
If you cannot see light through the center of the jet, soak the jet in a bath of clean gas or alcohol. After soaking for a few minutes, use compressed air to clear any dirt out of the jet. When you can see a clear hole in the center of the jet, reassemble the carb and follow our motorized bicycle carb tuning and setup instructions.
2.4 INLET MANIFOLD SEAL
Fit the carburetor back onto the inlet manifold and check that it is properly sealed. Check that the inlet manifold is sealed properly against the inlet port. Small air leaks will dilute the fuel:air mixture which makes starting difficult.
2.5 CARBURETOR POSITION

NT carburetor float
The float will stick against the stanchion if the carb is mounted too steeply. The float should slide up the stanchion and close the fuel valve to prevent an overflow of fuel in the carb.
2.6 MOTORIZED BICYCLE CARBURETOR UPGRADE


NT carburetor for motorized bicycles
The Rongong carb is a polular upgrade for motorized bicycles.
- less prone to flooding the engine,
- it can tolerate a greater fitting incline, and
- it is unlikely to require tuning adjustments.
3.1 RULE OF THUMB COMPRESSION TEST
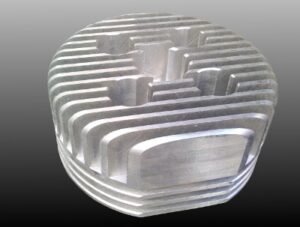
CNC cylinder head
CNC cylinder heads look macho and provide fantastic cooling for bicycle engines. Remove the spark plug and hold your thumb over the hole while pushing the motorized bicycle.
- broken piston rings and
- leaking oil seals.
4. SINGLE PIECE IGNITION


Motorized bicycle with internal ignition
Some bicycle engines have a single piece internal ignition system. These ignitions work well when set up correctly. Unfortunately, all of these motors we obtained from the Grubee factory had starting problems that required the ignition to be re-calibrated.
4. WIRING CONNECTIONS
The most common cause of an ignition failure is poor wiring connections. On single ignition bicycle motors, there are no external wires other than the switch leads and the wire on the module connector. If any connectors are loose, they can cause intermittent operation, particularly if the connector insulation is missing. A connection between the connector and any metal will cause the ignition system to short out and the ignition will not operate.
4.2. SPARK

Spark tester for motorized bikes
The spark can be difficult to see on bicycle motors with single piece ignitions. Cutting the electrode off an old plug makes the spark easier to see.
4.3 AIR GAP

Setting the air gap on internal ignition motorized bicycle engines
Old take-out containers make a perfect gapping tool.
A large air gap is another common cause for the bike not starting. Often, the air gap between the module and the rotor is too big, however, although less frequent, problems can also occur if the gap is too small.
To set the air gap, cut a piece of plastic approximately 80mm x 20mm cut from an old take ou- food container or similar material, and fit it as shown in the image.
Remove the Front left side cover from the motor and loosen the two retaining screws holding the ignition module. Turn the rotor until the magnet attracts the poles of the module.
Clamp up the screws, remove the plastic strip and turn the rotor to check it has clearance all round. If there is a tight spot. Repeat the paragraph above but make sure the ‘tight spot’ is opposite the pole pieces.
Once complete, turn the rotor a few times to make sure it doesn’t rub against the poles. Repeat the above process until the rotor turns freely with no rubbing. Test run the motor and, if all is fine, re-fit the side cover.
If still no go, replace the spark plug on your motorized bicycle, double check all wiring and make sure the module has not moved. If the spark tests are good, then you need to look elsewhere for the cause of engine failure, i.e. Incorrect or no fuel, fuel tap turned off (you will be amazed how many times this happens!) or a mechanical fault in the engine such as worn crank seals or leaking gaskets.
Conclusion
Motorized bicycles can often be difficult to start. There is, however, a logical process to isolate the fault in any internal combustion engine. The troubleshooting process can be used to find faults on 2 stroke or 4 stroke motorized bicycles.
The process first looks for ignition issues as there are quick tests to verify these problems.
When we have confirmed that electrics are working properly, we next check for fuel as these are the common cause of poor starting.
If both fuel and electrics are working properly, the last area to check is compression. As low compression is rarely the cause of starting issues on motorized bicycles, this is an area of last resort.
Following our logical fault finding tests makes it easy to resolve engine starting problems.
We believe that this guide will help you resolve the problems with your motorized bicycle and we hope you stay tuned for more articles.